Xiaomi Mi 3 Battery
Replacement

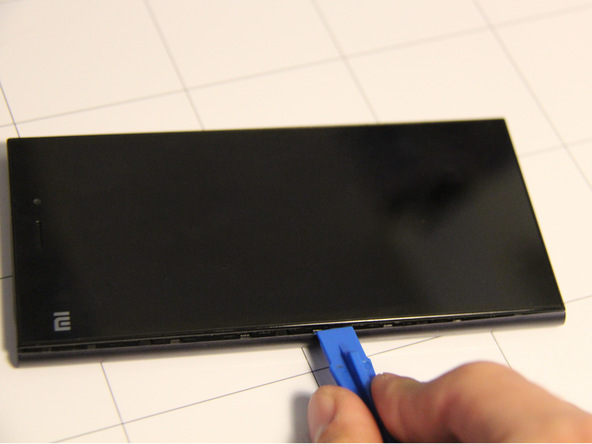
Step 1 Battery
Insert the
sim card removal tool into the hole located at the top of the phone.

Press the tool firmly into the phone to get
the sim card tray to eject from the slot.


Step 2
Remove the
two Phillips head screws located on the top of the phone.

One is
hidden under an orange sticker, removal of this sticker will void your
warranty, this sticker can be removed using a set of tweezers.

Step 3
Removal of
the orange sticker reveals a hidden screw that needs to be removed.


Step 4
We now want
to insert a pry tool into the upper portion of the phone, where there is a
small gap between screen and frame of the phone.


Be careful
when working the pry tool on the phone as it can result in damage to the
phone's screen or other components.

Step 5
Once a pry
tool has been inserted into the phone, work it around the entire perimeter of
the phone until the screen of the phone separates from the frame.


Step 6
Once a pry
tool has been inserted into the phone, work it around the entire perimeter of
the phone until the screen of the phone separates from the frame.


Step 7
The phone
should now be separate from the exterior frame portion of the phone.


Step 8
Place the phone screen side down with the camera located at the top.
Remove the 7 Phillips head screws, located on the upper portion of the phone.

One of these screws is hidden under an orange sticker at the top right corner of the phone, removal of this sticker can be removed using a set of tweezers.

Step 9
Remove the
3 screws located at the bottom of the back side of the phone.


Step 10
Using
tweezers, remove the rubber dust cover on the back panel of the phone
.


Step 11
Not
necessary for this goal. Do this for your own fun, if you like. Insert a
plastic opening tool into the bottom of the
phone, then work it around the lower portion of the phone in order to remove it
from the plastic cover.


Step 12
Insert a
plastic opening tool into one of the top corners
of the phone, then work it around the exterior portion of the phone until the
plastic cover can be easily removed from the phone.


Step 13
After working the pry tool the top cover can be easily removed.
Some models have their NFC antenna on the back of the battery glued to the top cover. It is not possible to remove the top cover without the battery. In that case, check the touchscreen guide.


Step 14
Using a
spudger, remove the small ribbon cable that is connected to the battery.


Step 15
Now grab a hold of the "Battery Removal" tab that is attached to the battery, located at the left side of the back portion of the phone. Lifting up on the tab should remove the battery out of the phone

It may take some force to remove the battery as it is also adhered to the phone with two pieces of double sided tape.

Step 16
The battery
is now removed from the phone.


Δεν υπάρχουν σχόλια:
Δημοσίευση σχολίου